Before we proceed, it is important to note that website migration and domain transfer are two different processes.
On the other hand, if you are comfortable navigating your File Manager, database, and FTP and would like to migrate your website to your new host, please proceed with the manual migration process below, which comprises several steps.
Before migrating your WordPress blog, you must create a database backup using phpMyAdmin.
To create a database backup via phpMyAdmin:
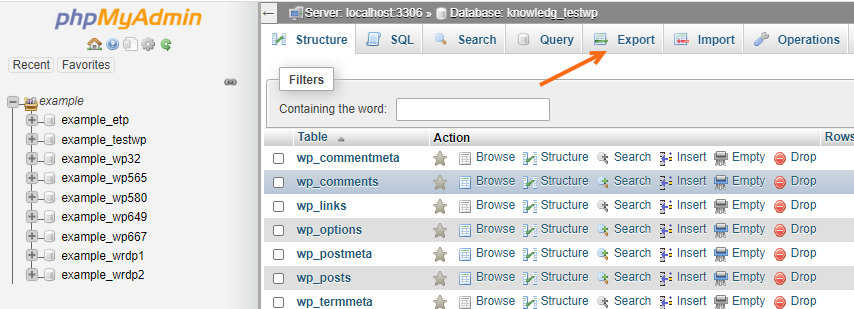

You have now successfully downloaded a backup of your database!
You must download ALL your files from your old host and upload them to your new host. This includes files from your themes folder and plugins folder. Make sure you also download any folders that were referenced outside of your blog's folder. For example, if you use a separate folder called 'images,' located outside the blog's folder, the images must be copied and uploaded to the new hosting location; otherwise, the site will contain many broken links to images within the blog post.
Filezilla is the recommended FTP client. By default, Filezilla does not display the .htaccess file for security reasons. To ensure your .htaccess file is included in the download, click Filezilla's Server tab and select Force to show hidden files.
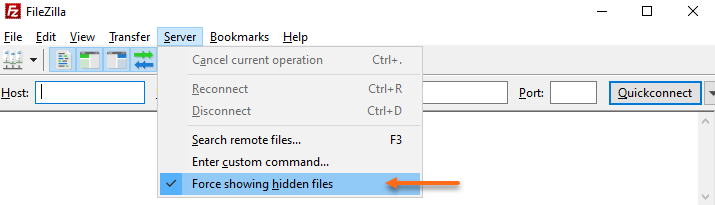
If you neglect to upload your .htaccess file, your permalinks will not work.
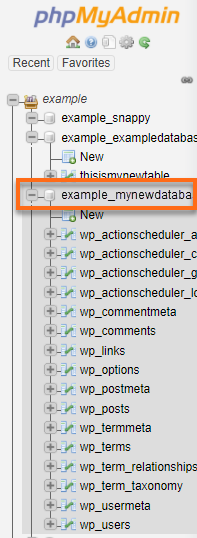
Once your WordPress core files are uploaded to your WPLH server, you must upload the database (.sql) file you downloaded from your old host in Step 1 to your WPLH database. To do this, you must create a new database and database user within phpMyAdmin and assign privileges to your new database user.
Once you create your new database name and user, grant All Privileges to your new user.
Okay! Now, you are ready to configure your wp-config.php file.
After creating a new database, you must edit the wp-config.php file, which is the WordPress configuration file. This specific configuration file reads directly from your database.
To update the WordPress configuration file:
/** The name of the database for WordPress */
define('DB_NAME', 'yourdatabasename');
/** MySQL database username */
define('DB_USER', 'yourdatabaseusername');
/** MySQL database password */
define('DB_PASSWORD', '**yourdatabasepassword**');
/** MySQL hostname */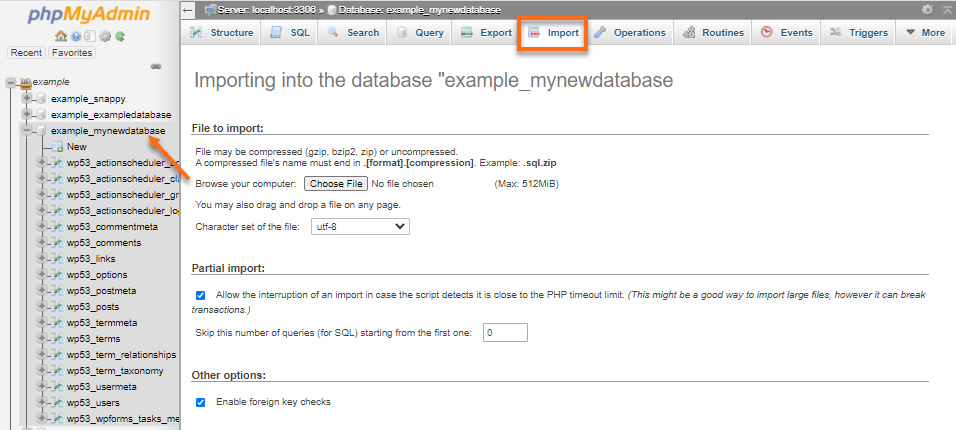
define('DB_HOST', 'localhost');The configuration file is now set up with the new database but contains no database tables. To correct this, you must import the information into the database.
You can use phpMyAdmin to import your database.
To import your WordPress database via phpMyAdmin, here's a quick overview.
Once these steps are done, try accessing your site in a browser.

