How to Assign a Dedicated IP Address to a Customer in Plesk
Warning: If you perform an IP address change, the domain will be down for up to 8 hours while it re-propagates.
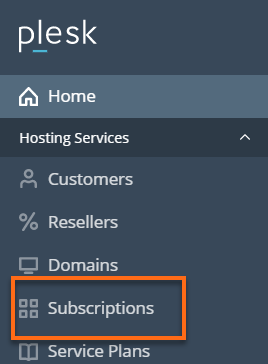
- Log in to Plesk Administrator.
- Navigate to the Subscriptions tab.
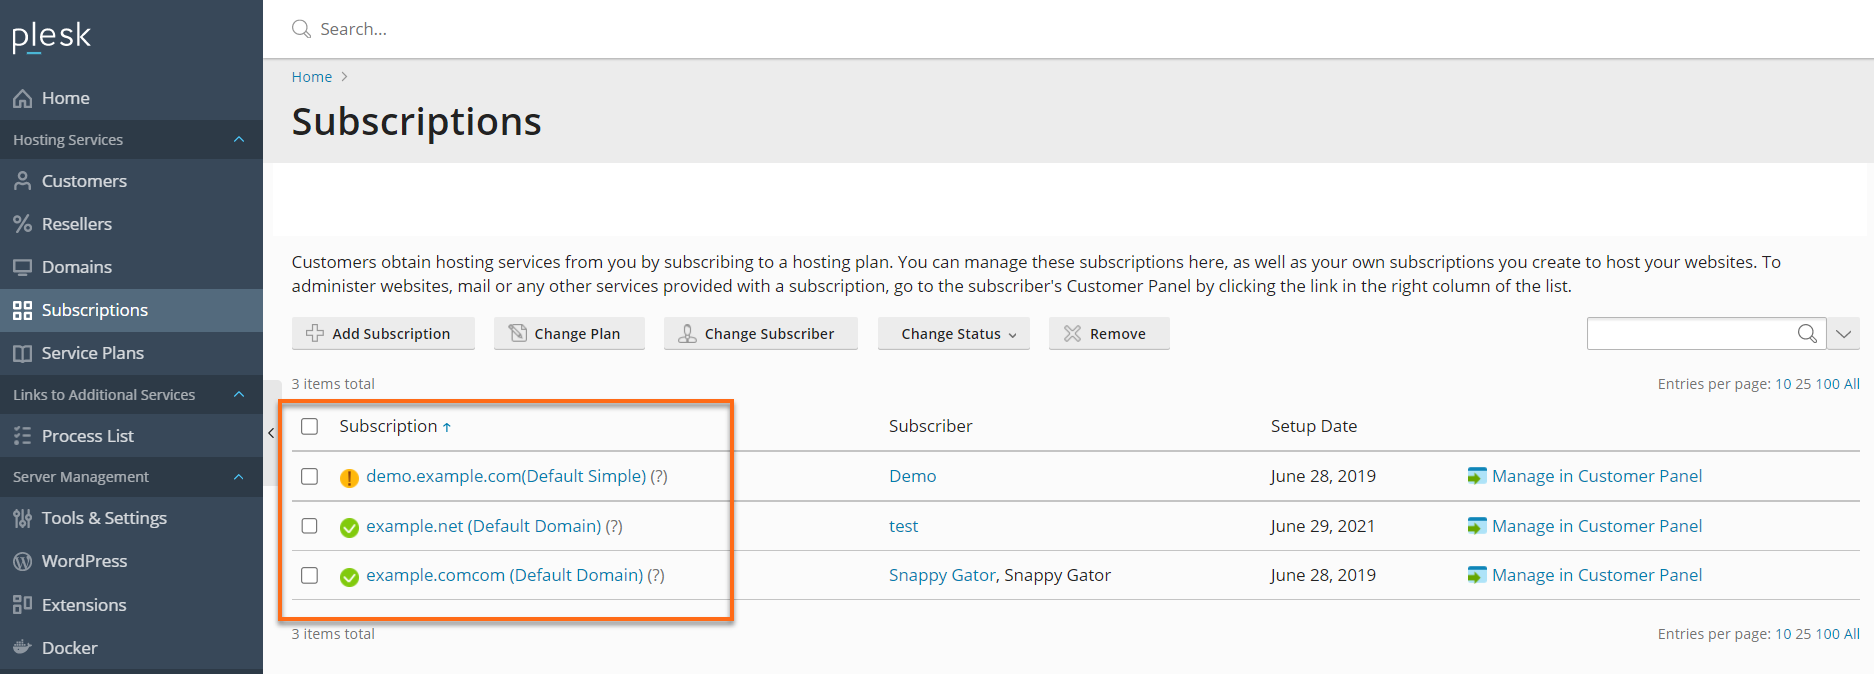
- Click the Domain name that you wish to modify on the left.
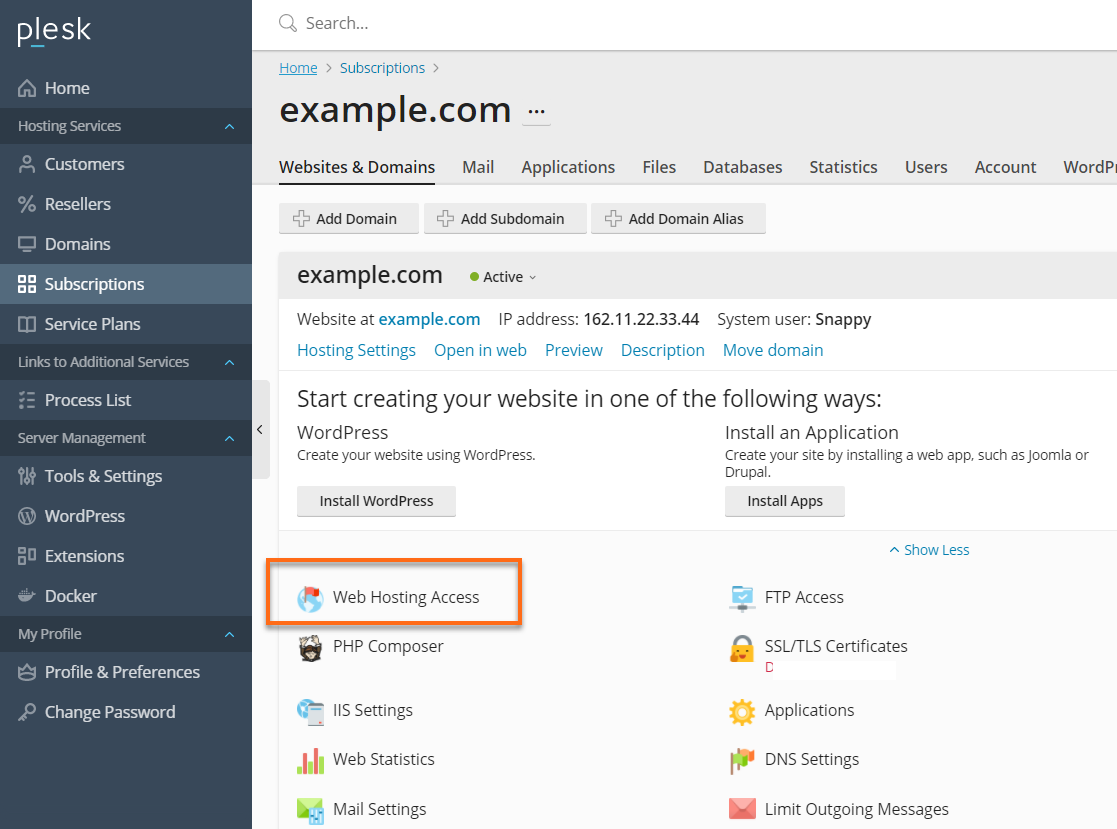
- Click Web Hosting Access.
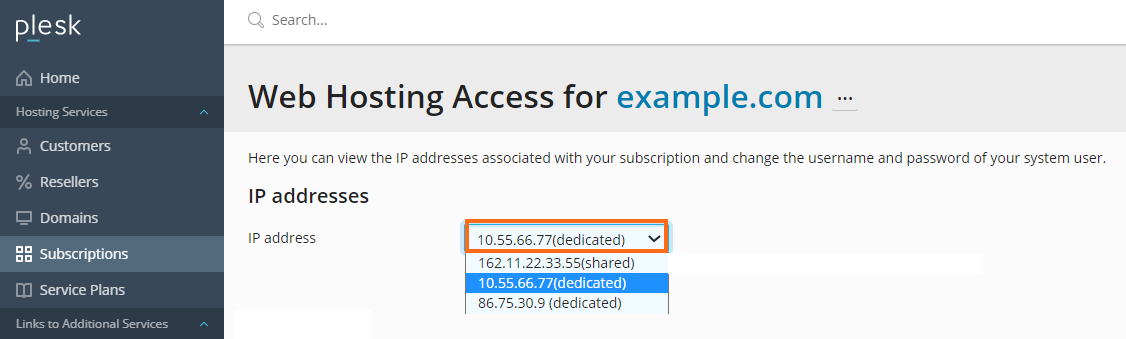
- Select the Dedicated IP that will be assigned to your domain.
- Click Apply at the bottom of the page to save the changes.
Note: Plesk will only display the IP addresses assigned to your server that are Dedicated IP addresses that are available and Shared IP addresses.
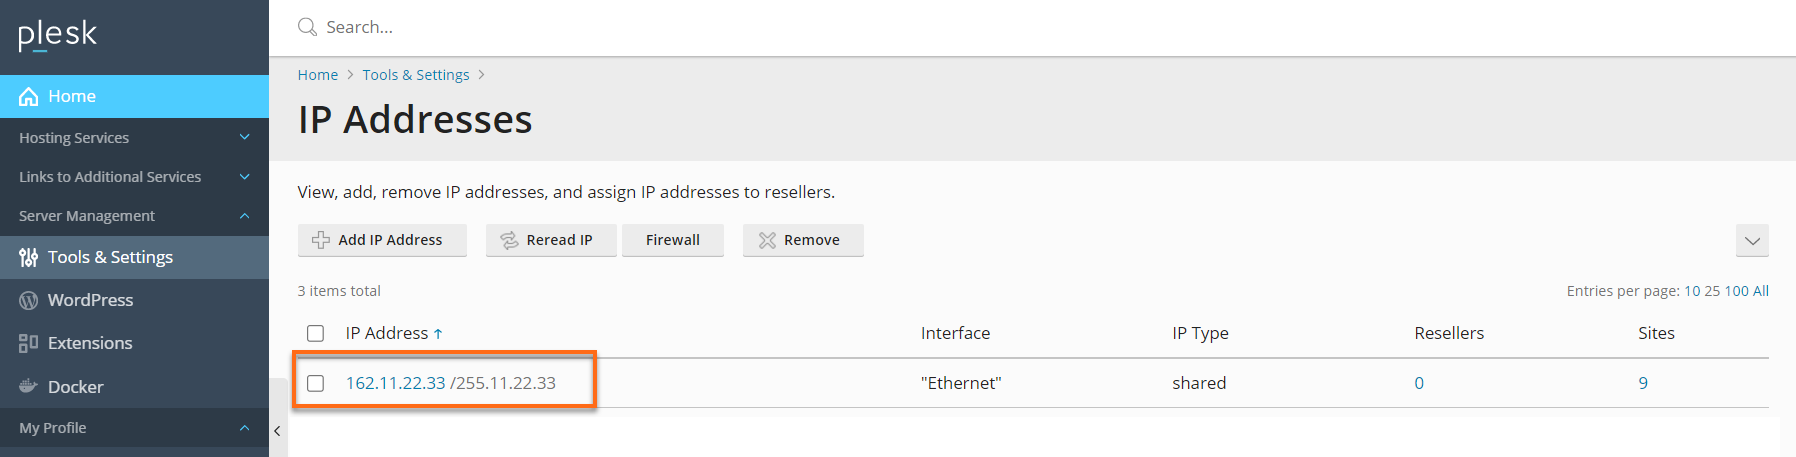
How to Change A Site’s Default IP Address
- Log in to Plesk Administrator.
- Click on Tools & Utilities.

- Click on IP Addresses.

- Select the IP address that you wish to modify.
- Enter the IP Address you want to assign.
Note: Makes sure to leave at least one IP address listed as Shared.
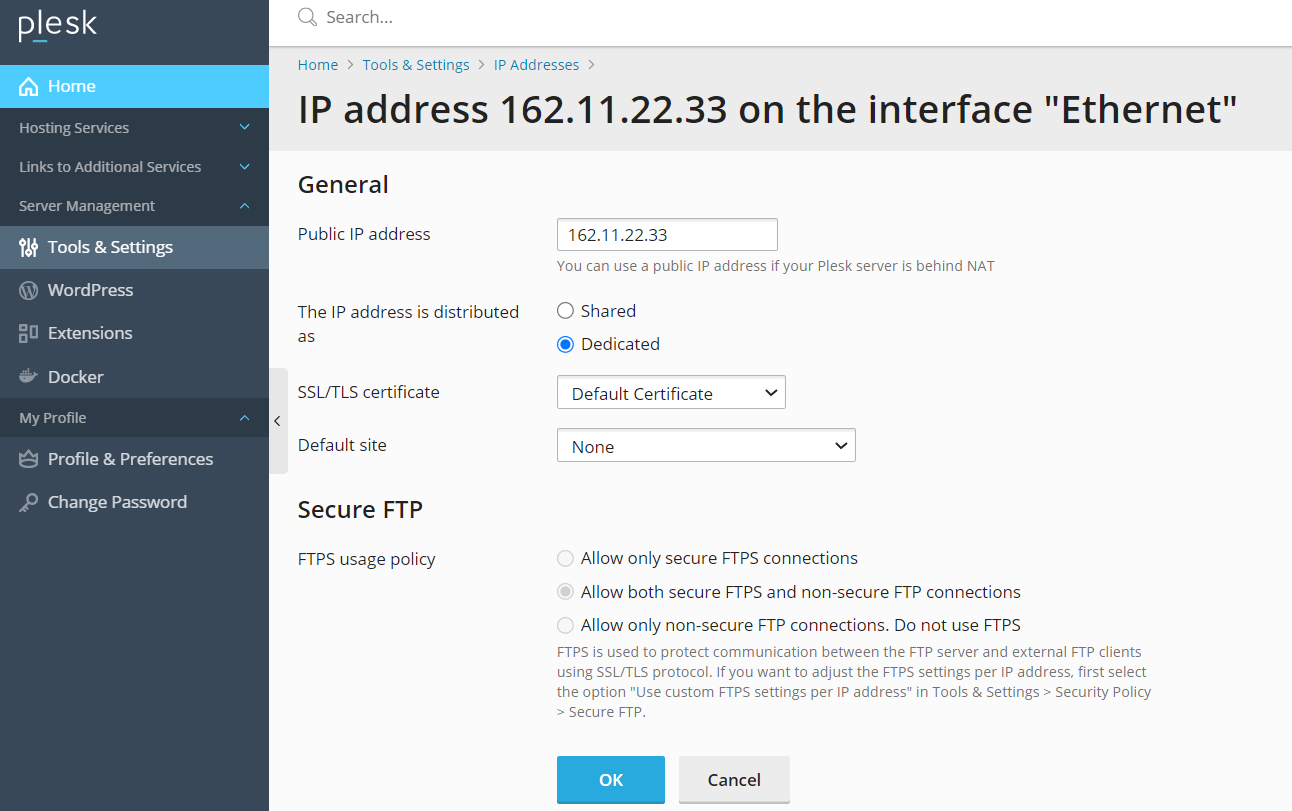
- To make this a dedicated IP make sure to change the IP Address to be distributed as Dedicated.
- For SSL Certificate leave to default if you haven't already installed an SSL
- For Default Site: using the pulldown menu choose the domain you want to have to be the default for this IP
- Click on OK

