There was a problem loading the comments.

Forwarding Mail in Plesk

Support Portal  »  Knowledgebase  »  Viewing Article

  Print

We initially set the email address for the customer account to deliver email to an address on the server. Still, we would like a copy of the email to be sent to our original email address.
 

To set up email forwarding:
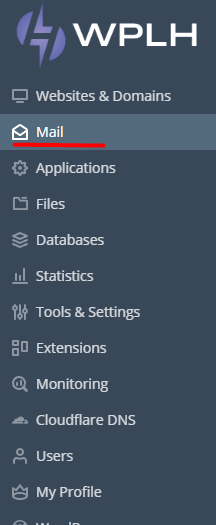
  1. Log in to Plesk.
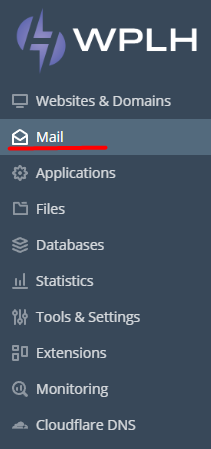
  2. Select the Mail tab from the left-side menu.

    d14c4c22d6b0300310c2ab3b8ae15b173627b1c851b178e6bfe726bd2fbc1f78d17b8628a9a43612?t=73bdf7d5e2fa66c2519a63adfe36d352

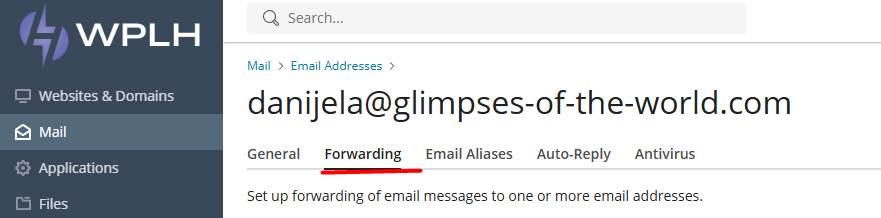
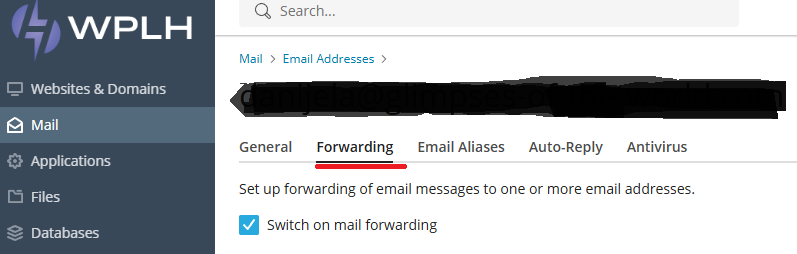
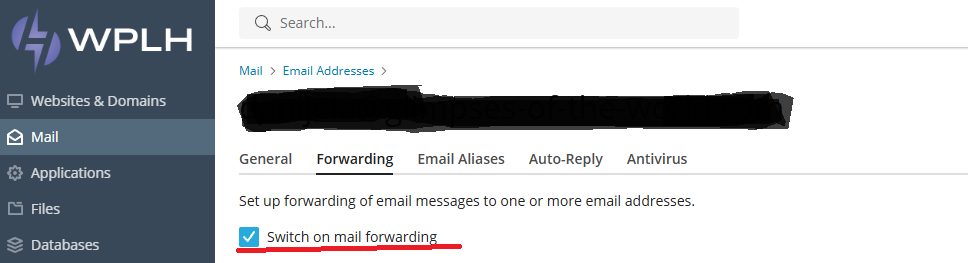
  3. Click on the email address in the listing; you will be taken to a page where you can change the properties.
  4. Select the Forwarding tab.

    0a748bed8588ceb3e8777a6d6a7f24035b2d418e23e4cb584952cbb7ab5d748095659e638611ca6a?t=417911fba46d5a0b4d984df62c481050

  5. Below the tabs, a checkbox labeled Switch on mail forwarding controls whether forwarding is enabled or disabled. Make sure the checkbox is selected.

    Plesk Mail Switch on mail forwarding

  6. Specify one or several email addresses to which email must be forwarded.

    Plesk Mail Email Address

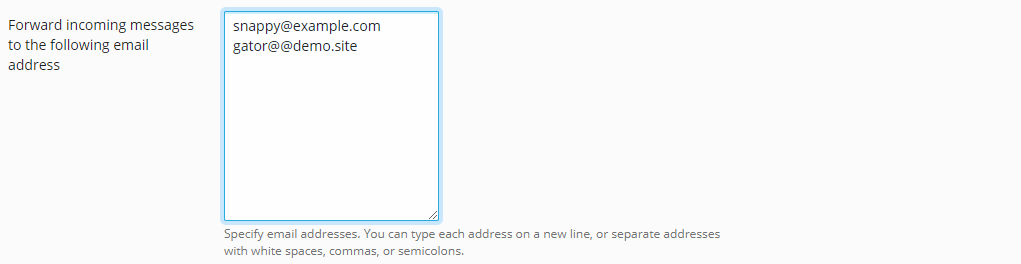
    Note: When specifying email addresses, you can type each address on a new line or separate addresses with white spaces, commas, or semicolons.
  7. Click OK.
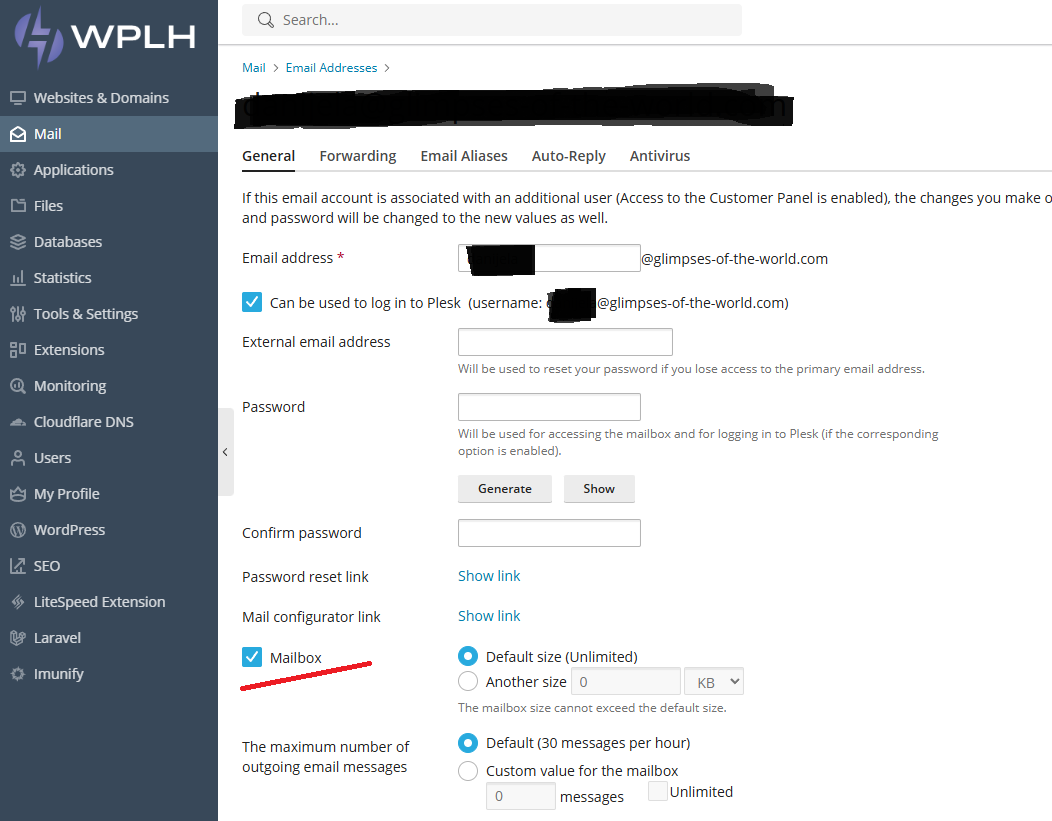
    If you do not want to keep copies of forwarded messages in the mailbox, go to Mail, click the email address and in the General tab, clear the Mailbox checkbox, and click OK.

    b3f973666b6308a169da8b62e86d154cfe0f93defc3959f8d2baf53badcbf9fc4dc5643ced55f690?t=24610c17d357506c738e9986e29e580e

To switch off email forwarding:

  1. Go to Mail.

    0b997f1c107ff9d74e1529621609d73afb1708c783f2931d9bc38d37972e172423fed5ac10d674cd?t=8d87b3ebd6032c5f52ec89355a45eb26

  2. Click on the email address.
  3. Select the Forwarding tab.

    2b4b5108f3ea36aa70d5738f5becc0c189ae047c1064395b211b75b0ceadd4df251f6f8bc7f45347?t=b3f9859709048daec7ab5988fbdb01c2

  4. Remove the checkmark on Switch on the mail forwarding.

    5948db530a8303bafb7b6c5cd1f3e857283bee3bceb1d60777c85cf7273e842d1412049612cc4965?t=e8c39269c586f13c46d2496d373d3406

  5. Click OK.

Share via
Did you find this article useful?  

Related Articles


Comments

Add Comment

Replying to  

CAPTCHA

On-Premise Help Desk Software by SupportPal
© Support Portal - WP Lighthost